
Key Takeaways:
- Assembling your wedding invitations is a simple, step-by-step process that helps your entire suite look polished, intentional, and beautifully coordinated.
- Many common assembly problems, like misaligned belly bands, smudged ink, or unclear stacking order, are easy to prevent or fix with a little preparation and guidance.
- Finishing touches matter: choosing the right postage, sealing envelopes properly, and coordinating day-of stationery ensure your invitations look seamless from mailbox to wedding day.
Your wedding invitation suite is the very first preview your guests get of your wedding. Before they see the venue, the flowers, or what you’re wearing, they see your invitations. Every choice, color palette, typography, and even the smallest design details help set the tone for the celebration to come.
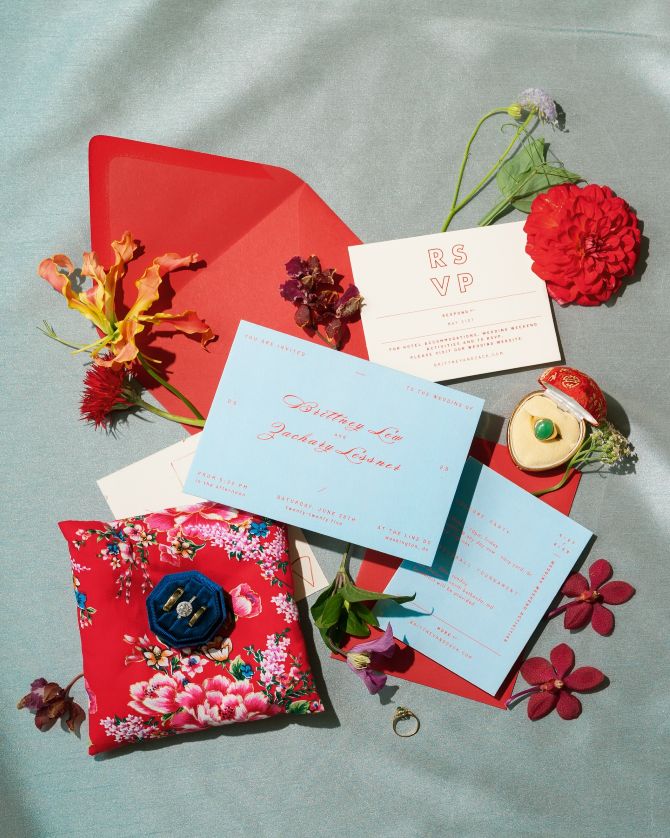
Most suites include a few different cards: your main invitation, reception card, detail or direction cards, and an RSVP, working together to share everything your guests need to know. In this guide, the experts at Minted show you how to assemble wedding invitations step by step so each envelope you seal feels polished, thoughtful, and completely "you."
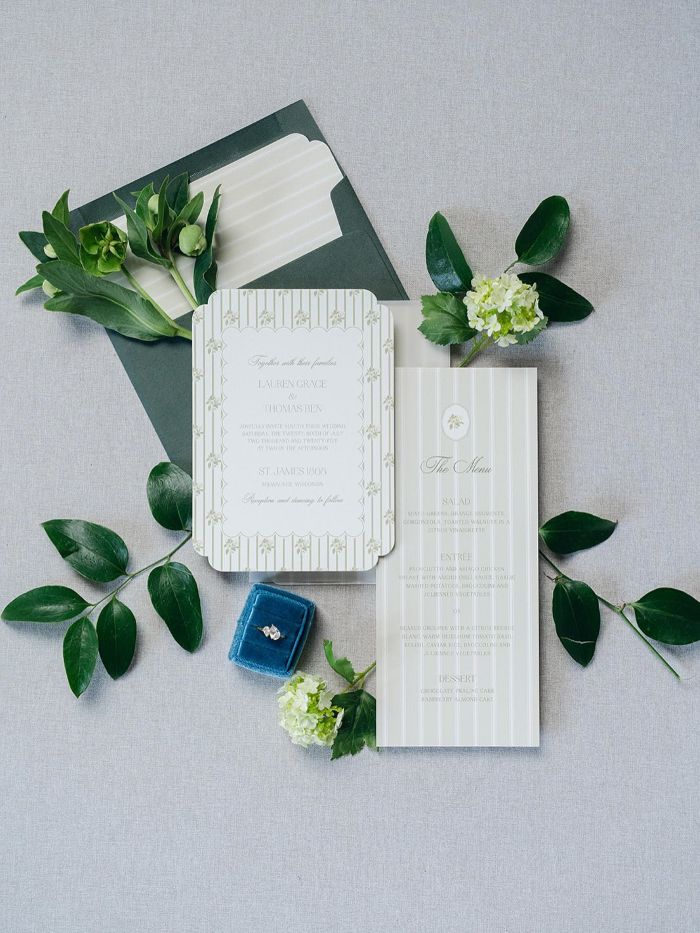
Summer Fields invitation and Summer Fields long menu by Lisa Joanna Harrison | Photo by Renee Breanne Design + Co
PREPARATION CHECKLIST
Before diving into assembly, take a moment to prepare your workspace and gather all necessary materials. A well-organized setup will make the process smoother and help protect your beautiful invitations.
What you'll need
- Clean, flat workspace with good lighting
- Ruler or straight edge for alignment
- Sharp scissors (fabric shears if using ribbon)
- Envelope moistener or small sponge
- Clear adhesive or double-sided tape (if using belly bands or ribbons)
- Lint-free cloth for cleaning surfaces
- Heavy books for envelope pressing
- Storage boxes for completed invitations
Setting up your workspace
Choose a clean, flat surface away from food, drinks, and potential spills. Good lighting is essential for accurate assembly and addressing. Cover your workspace with a clean white sheet or paper if needed to protect invitations from any surface debris.
Organizing components
Sort your invitation pieces into separate stacks:
- Main invitation cards
- Reception cards
- Enclosure cards
- RSVP cards and envelopes
- Outer envelopes
- Embellishments (belly bands, ribbons, or vellum wraps)
Time and help needed
- Assemble your wedding invitations 1–2 weeks before your mailing date so you have time for addressing, postage checks, and any last-minute fixes
- Plan for about 15-20 minutes per 10 invitations when working efficiently
- A team of 2-3 people is ideal: one person to assemble, one to stuff envelopes, and one to check quality
- For 100 invitations, set aside 2-3 hours with helpers, or 4-5 hours if working solo
Storage tips
- Keep completed invitations flat in sturdy boxes
- Store in a cool, dry place away from direct sunlight
- Avoid stacking heavy items on top of invitation boxes
- Consider keeping a few extra assembled invitations separate for photos or keepsakes
Pro Tip: Create a sample invitation first and keep it nearby as a reference for consistent assembly.
WEDDING INVITATION ASSEMBLY STEPS
Step 1: Start with the main invitation card
For the most part, wedding invitations are assembled in size order, with each card placed face up and the largest card on the bottom. Start with the invitation card on the bottom, print side up. (Need help with what to say on your invitations? Check out our complete guide to wedding invitation wording for inspiration and etiquette tips.)
Step 2: Add vellum liners
Traditionally, invitations were packaged with thin sheets of vellum in between each card to prevent the ink from smearing or rubbing off during the mailing process. If you’d like to include it, place the vellum liner on top of the invitation card.
Step 3: Stack the reception card
Next, if you are using a reception card, place it face up on top of the wedding invite.
Step 4: Stack other enclosure cards
Place the remaining enclosure cards—i.e., direction or detail card, map card, or hotel accommodations card—face up on top of the reception card.
If you have a wedding website, include the website address and password info on one of the enclosure cards. Many couples also opt for a QR code that guests can easily scan to visit the website. Make sure to have your website updated before sending out the invitation suite.
Pro Tip: If the main wedding invitation is a folded card, place enclosures within the folded invitation (not on top).
A wedding in Low Country wedding invitation, A Wedding in Low Country RSVP card and A Wedding in Low Country rehearsal dinner by Chris Griffith and storybook garden save the date by Karidy Walker | Photo by Lisa Leanne Photography
Step 5: Add an RSVP card and envelope to the suite
If you have chosen to add a belly band, a ribbon, or a vellum wrap to perfectly complete your suite, you’ll want to assemble them now. See our FAQ section below for our tips on recommended ribbon lengths, ways to tie your ribbon, and how to fasten your belly band.
Step 6: Add Accessories
If you have chosen to add a belly band, a ribbon, or a vellum wrap to perfectly complete your suite, you’ll want to assemble them now. See our FAQ section below for our tips on recommended ribbon lengths, ways to tie your ribbon, and how to fasten your belly band.
Step 7: Recipient addressing
While more formal invitation suites may include inner envelopes (printed with guests’ names) and outer envelopes (printed with guests’ names and address), Minted has seen a shift toward sustainability and simplicity through the use of just a single outer envelope. For this reason, only outer envelopes are included with all of our invitations.
Traditionally, calligraphy was used to address envelopes; if you’re hiring a calligrapher, be sure to get your envelopes to him or her at least two to three weeks before you need them. For an efficient and polished look, you could skip the calligraphy and save time by printing the names and addresses directly on the envelopes. Remember, when you print your invitation suite with Minted, guest addressing and custom envelopes are free!
Step 8: Insert the whole suite into the envelope
If you purchase slip-in envelope liners with your invitations, be sure to slide these into your envelopes prior to inserting your suite. To do so, peel off the strip of adhesive on the back of each liner and slide it into place, pressing firmly to ensure it is secure.
Insert the fully assembled invitation suite into the envelope, left edge first for a single-card invitation; folded edge first for a folded invitation. This is so that when the flap is opened, guests can read the invite as they take it out with their right hand without having to turn the card.
Step 9: Seal the envelope
Use a bottled envelope moistener to wet the gummed edge of your outer envelopes; be careful not to use too much—you don’t want soggy, puckered envelopes. After you’ve sealed all the envelopes, place a heavy book or two on top of the stack to ensure all of them are securely sealed. Add the wax seal after securing your envelope if you opt for one.
Step 10: Return Address
Make sure your envelopes have return address labels. If you opt for a SkinnyWrap™ or a rubber stamp address label, this is when you would like to apply it to each envelope.
Step 11: Mail and done!
Before you mail your wedding invitations, bring a fully assembled set to the post office and ask them to weigh it so you know exactly how much postage you’ll need (be sure to also ask about international postage rates, if applicable). Once all your envelopes are stamped with sufficient postage, bring them to the post office to be hand-canceled (instead of dropping them in a mailbox). Hand-canceling alerts the post office to manually sort the envelopes instead of running them through machines; this will reduce the risk of your invites being damaged in the mail.
Alaia wedding invitation, Alaia RSVP online enclosure card, and Alaia reception card by Blustery August Photo by Lake Soleil
Common Wedding Invitation Assembly Problems
Even with a clear plan, it’s normal to run into a few hiccups as you assemble wedding invitations. The good news is that most issues are easy to fix with a little patience and the right approach.
Here are the most common problems couples see, and how to keep your suites looking polished and guest-ready.
Missing critical information
One of the biggest headaches is realizing a key detail is missing after everything is printed. Before you assemble, double-check that your suite clearly includes names, date, time, venue address, RSVP deadline, and any dress code or wedding website info. Reviewing every card slowly with a fresh set of eyes can help you catch small omissions before they become big problems.
Ordering too few invitations
Ordering exactly to your guest list leaves no room for addressing mistakes, keepsakes, or last-minute additions. Aim to order about 10–15% more invitations than the number of mailing addresses on your list. Those extras give you flexibility and peace of mind if you need to redo an envelope or invite a few more guests closer to the date.
Misaligned belly bands
Crooked or slipping belly bands can make an otherwise beautiful suite look a little off. To keep everything aligned, assemble on a flat surface and center the band on one sample invitation first, using the card edges as your guide. Once you’re happy with that sample, use it as your reference for the rest of your invitations.
Warped or bent invitation cards
Minor warping or bent corners can usually be fixed at home. Stack small groups of invitations between heavy books for 24-48 hours to help them flatten out, and always store your cards flat in sturdy boxes. For more noticeable damage, use the extra invitations you ordered as replacements, so every suite looks crisp and clean.
Humidity-related paper issues
Humidity can cause paper to curl, soften, or stick together as you assemble wedding invitations. Whenever possible, work in an air-conditioned space and keep invitations stored in closed boxes until you’re ready to use them. In especially humid climates, silica gel packets and a cool, dry room can make a big difference in how your paper behaves.
Ink smudges on printed pieces
Smudged ink is a common issue when you’re excited to get started and handle cards too soon. Give all printed pieces plenty of time to dry (24 hours is a good benchmark) before you begin assembling. Handle cards by the edges with clean, dry hands and keep drinks, lotions, and anything damp away from your workspace.
Minor ink or edge damage
Small marks or tiny nicks along the edges don’t always mean you have to discard a card. A clean white eraser can help lift light marks, and an archival pen in a matching color can disguise very small flaws. For any damage that still catches your eye, swap in one of your extra invitations so only the best pieces make it into your suites.
Poorly sealed envelopes
Envelopes that pop open in transit can lead to damaged or lost invitations. Instead of over-wetting the adhesive, use a barely damp sponge and press the flap firmly closed, then place sealed envelopes under a heavy book to help them set flat. For extra security, a thin strip of double-sided tape can help keep stubborn flaps in place without adding bulk.
Rushing the assembly process
Most of the issues mentioned above happen when you rush. Set aside dedicated time to assemble your wedding invitations and break the work into small, manageable batches. A relaxed pace will give you more consistent, polished results than trying to power through everything at once.
Skipping a test run
Diving straight into a large stack without a test run can lead to inconsistent stacking and stuffing. Start by assembling one complete invitation suite from start to finish, then check the order, fit, and overall look. Use that sample as your guide for every other invite so each envelope you seal looks intentional and consistent.
Incorrect card size order
When cards are stacked out of size order, the suite can feel cluttered and harder to read. Always start with the main invitation at the bottom and layer smaller cards, like reception and detail cards, on top, all facing up. RSVP cards and envelopes should come last so guests can easily flip through and find exactly what they need.
Incorrect postage
Postage is an easy place to miscalculate, especially with heavier paper, multiple enclosure cards, or added elements like ribbon and wax seals. Before you stamp every envelope, bring one fully assembled invitation suite to your local post office to confirm the exact postage required. This simple step helps you avoid returned mail, delays, and surprise costs.
Ocean Dreams by Sabrin Deirani | Photo by Presley Planning
Wedding Invitation Assembly: Frequently Asked Questions (FAQs)
As you start putting everything together, it’s totally normal to have a few “wait, am I doing this right?” questions. These are some of the things couples ask us most often about assembling their wedding invitations.
Will my wedding stationery arrive assembled?
No. Wedding invitations and enclosure cards are shipped to you flat in stacks, so you’ll assemble them at home. Belly bands, envelope liners, ribbons, vellum wraps, jackets, and pockets will also need a little assembly, like wrapping, folding, or cutting to your preferred length.
What is the proper way to put an invitation in an envelope?
Place your fully assembled suite into the outer envelope with the text facing up and the left edge (or folded edge) going in first. That way, guests see the front of your invitation as soon as they open the flap. Once your invitations are assembled, our guide to addressing wedding envelopes will help you tackle the next step.
How do you assemble wedding invitations without an inner envelope?
You’ll follow the same basic stacking order even without an inner envelope. Stack your main invitation on the bottom, then layer your reception card, detail or accommodations card, and finally the RSVP card with its envelope on top before sliding everything into the outer envelope.
Do you seal the inner envelope of a wedding invitation?
No. Traditionally, the inner envelope is left unsealed and simply tucked inside the outer envelope. The inner envelope displays the guest names, while the outer envelope carries the mailing address and protects everything in transit.
Do envelope liners require assembly?
If you ordered pre-lined or foil-lined envelopes, those arrive with the liners already in place and require no extra steps. Minted’s customizable slip-in envelope liners, however, come separately with a peel-and-seal adhesive strip so you can quickly slide and press them into your envelopes for a finished look.
How do you use a belly band?
Minted’s belly bands are narrow strips designed to wrap around your stacked suite and hold all the pieces neatly together. Center the band on the front of your assembled invitation stack, flip everything face down on a flat surface, then wrap and secure the ends with the included clear sticker or a small piece of double-sided tape. You can pair your belly bands with coordinating ribbon and other stationery accessories for an extra finishing touch.
How do you assemble wedding invitations with ribbon?
Use a piece of string to measure how much ribbon you’ll need by wrapping it around one fully assembled suite in your preferred style (band, knot, or bow), then cut your ribbon to match. Tie the ribbon snugly around each stack and trim the ends at an angle or in a small dovetail for a polished look, using fabric shears to help prevent fraying. For a flat wraparound band, double-sided tape works better than glue and keeps everything neat alongside your other stationery accessories.
How do I assemble my All-in-One wedding invitations?
Minted’s all-in-one wedding invitations arrive pre-scored, so assembly is quick and simple. Fold up the bottom RSVP panel, fold down the top flap, and then seal the piece closed with the clear stickers provided. Once sealed, the all-in-one functions as its own envelope and can be addressed and stamped on the outside.
How much postage will I need to mail my wedding invitations?
A single invitation card usually weighs less than one ounce, but additional enclosure cards, heavy paper, ribbon, or wax seals can increase the postage required. The most reliable option is to bring one fully assembled invitation suite, including all embellishments, to your local post office and have it weighed. They can confirm the correct postage and flag any surcharges for square sizes or non-machinable envelopes.
Will Minted mail my wedding invitations for me?
Minted does not offer mailing services at this time. Your full order is shipped to you so you can assemble, address, stamp, and mail your invitations on your own schedule. Many couples turn this into a small “assembly party” with friends or family to make the process faster and more fun.
Does Minted send wedding invitation samples?
Yes. Minted offers free wedding invitation samples so you can see papers and printing techniques in person before you order. You can request a curated free sample kit with our designs, build a kit with your own favorite wedding invitation designs, or try a personalized save the date sample to see your details in print. All options are free, so you can feel confident about your choices before placing a full order.
Tie Your Wedding Stationery Together
Once your invitations are in the mail, you can turn your attention to the details guests will see on your wedding day itself. Carry your look through with coordinated programs, place cards, table numbers, and other day-of pieces that match your invitation suite.
Not sure where to start? Schedule a free consultation with Minted's stationery expert for personalized recommendations and help customizing every last detail.