
Key Takeaways:
- Start the process of creating your wedding website by choosing a platform that meets your pricing, design, and customization needs.
- At a minimum, your wedding website should include your wedding event information, registry information, and RSVP information/functionality.
- Travel and accommodation information as well as FAQs are also good ideas to include on your wedding website to minimize guest questions.
- Use customization tools to add images and share your love story with guests.
The goal of every good wedding website: give guests the details they need to prepare for your wedding—and get them excited to join you for your celebration in the process! To help you pull it off, Minted’s wedding experts have put together this handy guide to everything you need to know about creating a wedding website.
Step 1: Choose a Wedding Website Platform
Like with every aspect of wedding planning, you have no shortage of options when it comes to choosing where to build and host your wedding website. But not all platforms are created equal. Here, we break down the differences between a few of the most popular, so you can choose the best wedding website for your big day.
| Minted | Zola | The Knot | Joy | |
|---|---|---|---|---|
| Base Price | Free | Free | Free | Free |
| Templates | 500+ artist-designed templates that coordinate with Minted’s wedding stationery | 300+ templates with corresponding physical and digital invitations. | 100+ templates with corresponding stationery | 100+ templates with corresponding physical and digital stationery. |
| Customization Capabilities | Extensive | Extensive | Somewhat limited | Extensive, including custom coding |
| Guest Management | Built-in multi-event RSVP capabilities | Built-in multi-event RSVP capabilities | Built-in multi-event RSVP capabilities | Built-in multi-event RSVP capabilities |
| Registry | Cash and gift registries can be linked | Built-in registry platform and cash fund | Built-in registry platform + can sync with 17 partner sites | Built-in registry platform and cash fund |
| Custom URLs | Yes ($15) | Yes (Starting at $14.95) | Yes (Starting at $19.99) | Yes (but not built-in) |
Dedicated website hosting platforms like Squarespace and Wix also offer wedding website templates. And while these are great options for couples looking for a truly custom experience, they don’t tend to have built-in features like guest RSVP management or registries, which can make them more difficult to manage.
Why Choose Minted for Your Wedding Website
Minted’s wedding websites offer the perfect blend of elegant design and seamless functionality. Our artist-designed and endlessly customizable wedding websites match your wedding invitations and coordinating stationery, which means your guests will experience a cohesive look, from start to finish.Take advantage of free features like a photo and video gallery, password protection, custom pages, and more. Upgrade to a custom URL for an even more personalized experience, or schedule a Wedding Website Consultation with a stationery expert to walk you through the ins and outs of building your perfect website.
Step 2: Choose a Template
Once you’ve chosen your preferred wedding website platform, the fun can really begin! Start by browsing wedding website designs to find one that complements your wedding's overall style and vibe. For a consistent, cohesive experience for your guests, we recommend going for a website design that matches the look, feel, and color of your wedding stationery suite. (Need some inspiration for your wedding invitations? Check out our full guide.)
Many of Minted’s save the date and invitation designs come complete with a coordinating website template, making it super easy to ensure every touchpoint your guests have with your wedding is equally on theme and beautiful.
Step 3: Customize the Look and Feel of Your Website
Once you've selected a wedding website design, choose a color palette that matches the overall wedding theme, along with a website layout that you like. Most companies offer multiple image and text layouts to choose from — at Minted, we offer both single-page and multi-page layouts, as well as a few standard options for the look and feel of your home page.
Pro tip: If you need any help customizing or setting up your wedding website, schedule a consultation with a stationery expert to help you every step of the way.
How to do it at Minted
- From the dashboard of your wedding website account, select “Customize Design” in the right-hand menu.
- Select from our artist-curated color schemes or create a custom color palette of your own to use across every element of your wedding website.
- Choose your layout and page style.
- Choose from dozens of fonts to create the perfect typography suite across your website.
Step 4: Add Your Wedding Details
Your wedding website should serve as a hub of all of the information your guests need to know about your wedding — as well as a few extra details that will help make their experience at your big day as enjoyable as possible. Below, we’ll share everything your wedding website should include, but don't feel like you need to have all your wedding details finalized to begin working on your website.
Think of your wedding website as supplementary to your save the dates. Just like your save the dates, your website can also start with only the essentials: the wedding date, location, and time. As you finalize more details of your wedding celebration, you can add them to the website — this can include information like travel tips, lodging suggestions, event schedules, dress code, directions, and more.
Names, Wedding Date, & Welcome Message
Welcome guests to your wedding website by including a favorite shot (or two, depending on the layout you choose) from your engagement photos and a heartfelt message that expresses your excitement to see them on the homepage.
How to do it at Minted
- Select “Site Editor” from the top navigation menu of the wedding website dashboard.
- Select “Home” from the pages menu on the left-hand side of your screen.
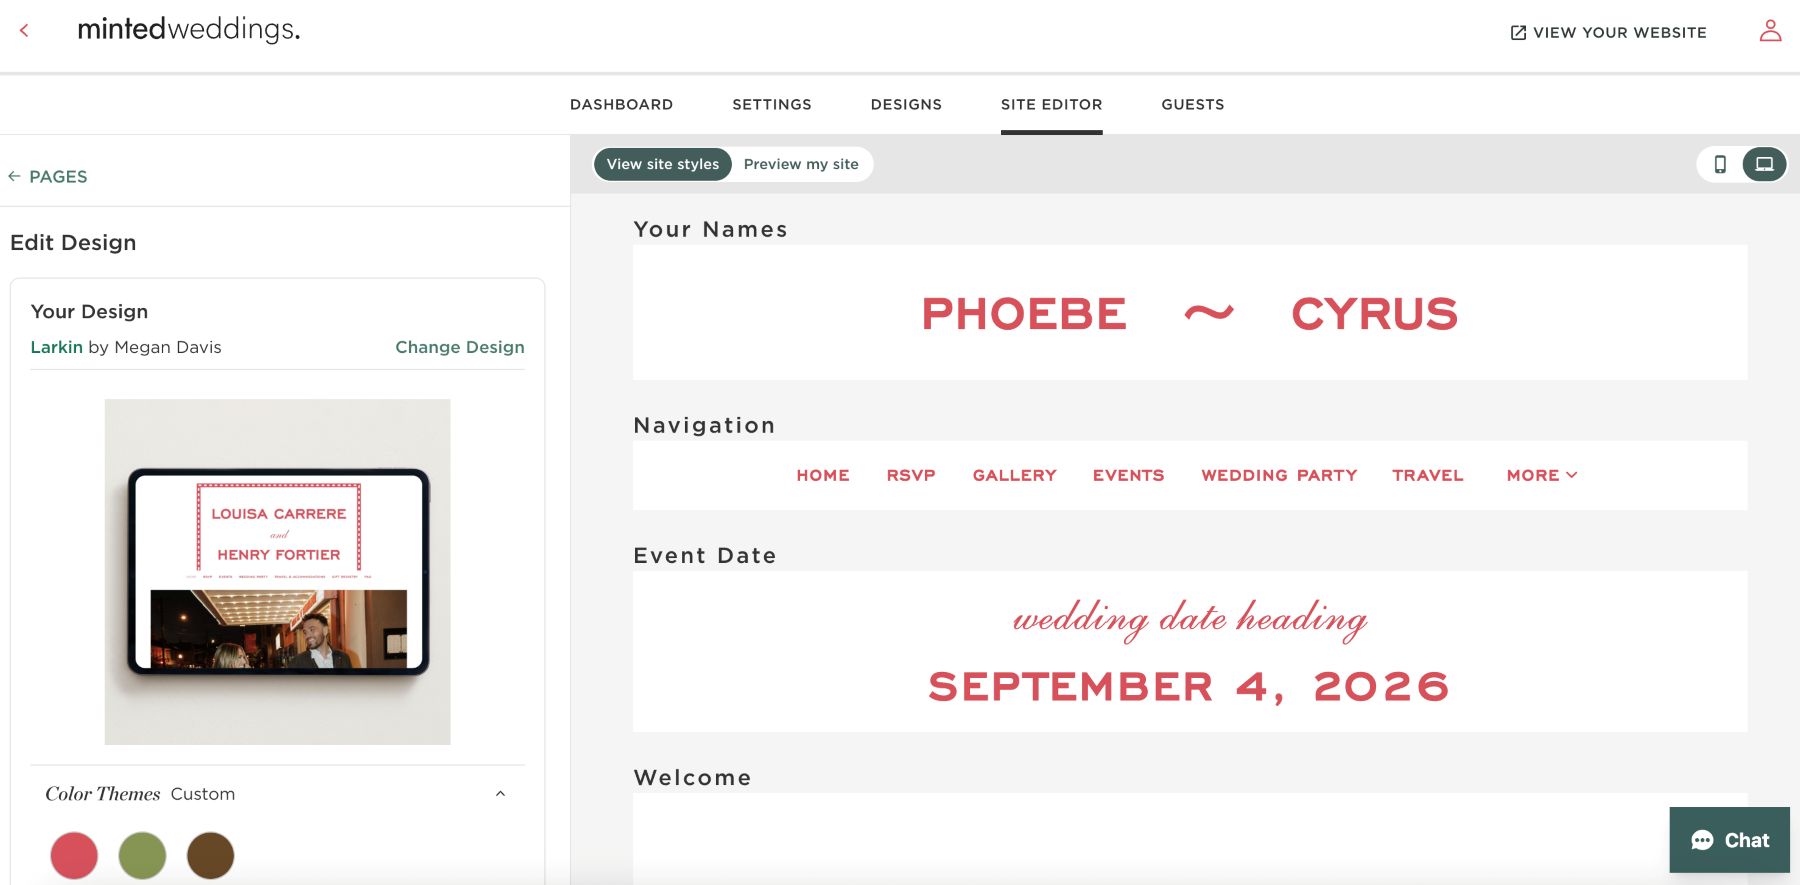
- Use the form field editors in the left-hand bar to edit various sections of the home page.
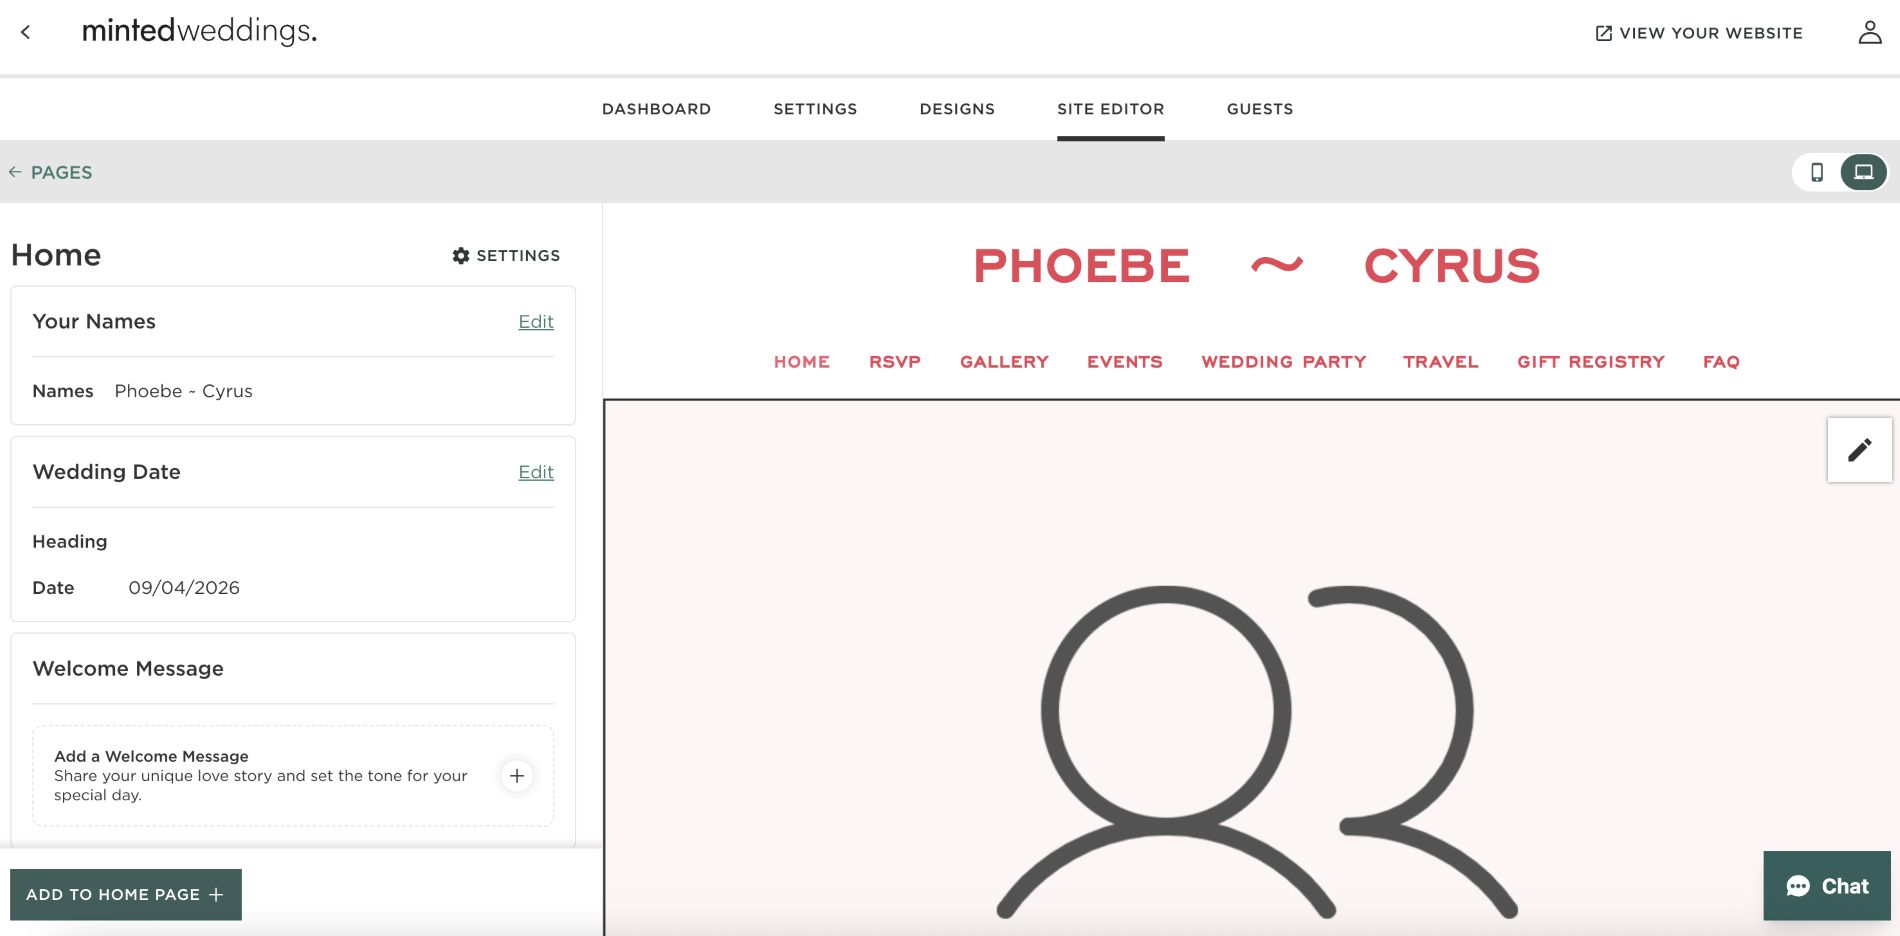
- Your names and wedding date should automatically populate, but if you need to edit them, select “Edit.”
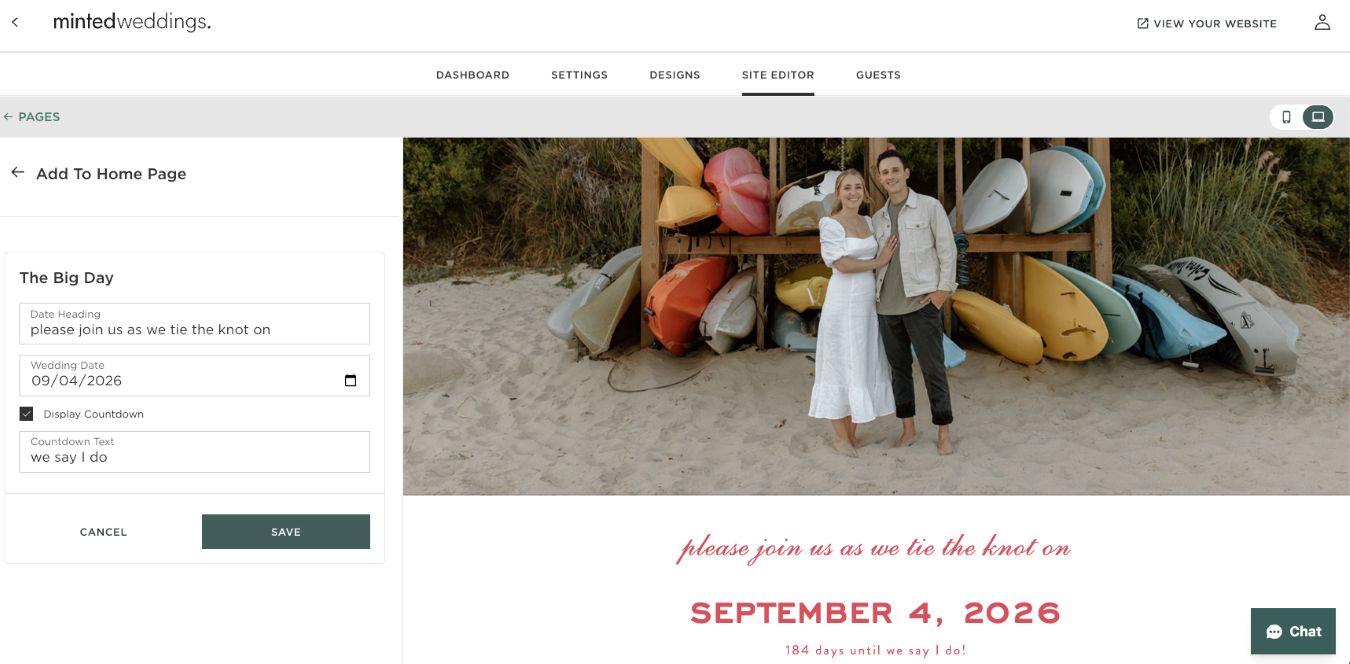
- To customize your welcome message, select “Edit” in the wedding date field and add your own Date Heading. While here, you can also choose to add a wedding countdown to the homepage of your website by selecting the “Display Countdown” checkbox.
- To add a photo to your wedding website home page, click on the pencil button within the photo placeholder, which will be visible towards the right-hand side of your screen. Upload your favorite photo and use our crop tool to fit the layout of your website, if necessary.
- You can add additional photos to the home page of your wedding website by using the “Add to Home Page” button and selecting a single image, an image and text block, or a gallery of images.
- To update the layout of the home page, go back to the “Customize Design” menu in your dashboard. From there, you can play with layouts that place more or less emphasis on your names at the top of the page, that include two photos, or that skip photography altogether.
Your Story
Located on the homepage of your wedding website, the “Our Story” section is a place to recount your love journey and/or share the proposal story. Not sure where to start? Here are some tips on writing this section on your wedding website:
- Share the memorable moments that define your relationship. You might want to include details about how you first met, your first date, the proposal story, what you love and admire most about each other, and the most significant experiences from your relationship so far.
- Keep this section warm and light-hearted; a bit of playfulness and humor can be a great way to engage with your guests.
- Keep it brief. There's no need to write a novel! A couple of sentences that describe your first date, engagement story, and what you love about each other are all you need to provide guests with some insight into your relationship.
How to do it at Minted
- Select “Site Editor” from the main navigation bar of Minted’s wedding website builder.
- Select “Home” from the navigation menu on the left-hand side of the page.
- Scroll down to the bottom to find the “Welcome Message” section. If you’d like, you can change the text to display something other than “Our Story” (“Our Love Story” is a sweet idea, so is something like “Love at First Sight”). Then, use the field below to insert a paragraph or two describing your love story.
Wedding Events
Most guests just want to be told where they need to be and when. Be sure to provide clear information about event times, including the ceremony, reception, and additional activities like the welcome party and farewell brunch.
Pro tip: Most wedding website builders will offer “Private RSVP” functionality. Be sure to enable this feature for exclusive events, such as a rehearsal dinner that’s just for wedding-party members or a bridesmaids-only breakfast. This ensures that only those invited will see it on their event list when submitting their RSVP and other guests don’t get confused or feel left out.
How to do it at Minted
- From the “Pages” editor, select “Events.”
- Select “Add Event.”
- Select your event type from the drop-down menu or add your own event title.
- Include all the details of your event, including what it is, the date, its start and end times, the location, and the venue name.
- Use the “Event Description” field to add any additional information, such as dress code, parking instructions, or if the event will be child-friendly.
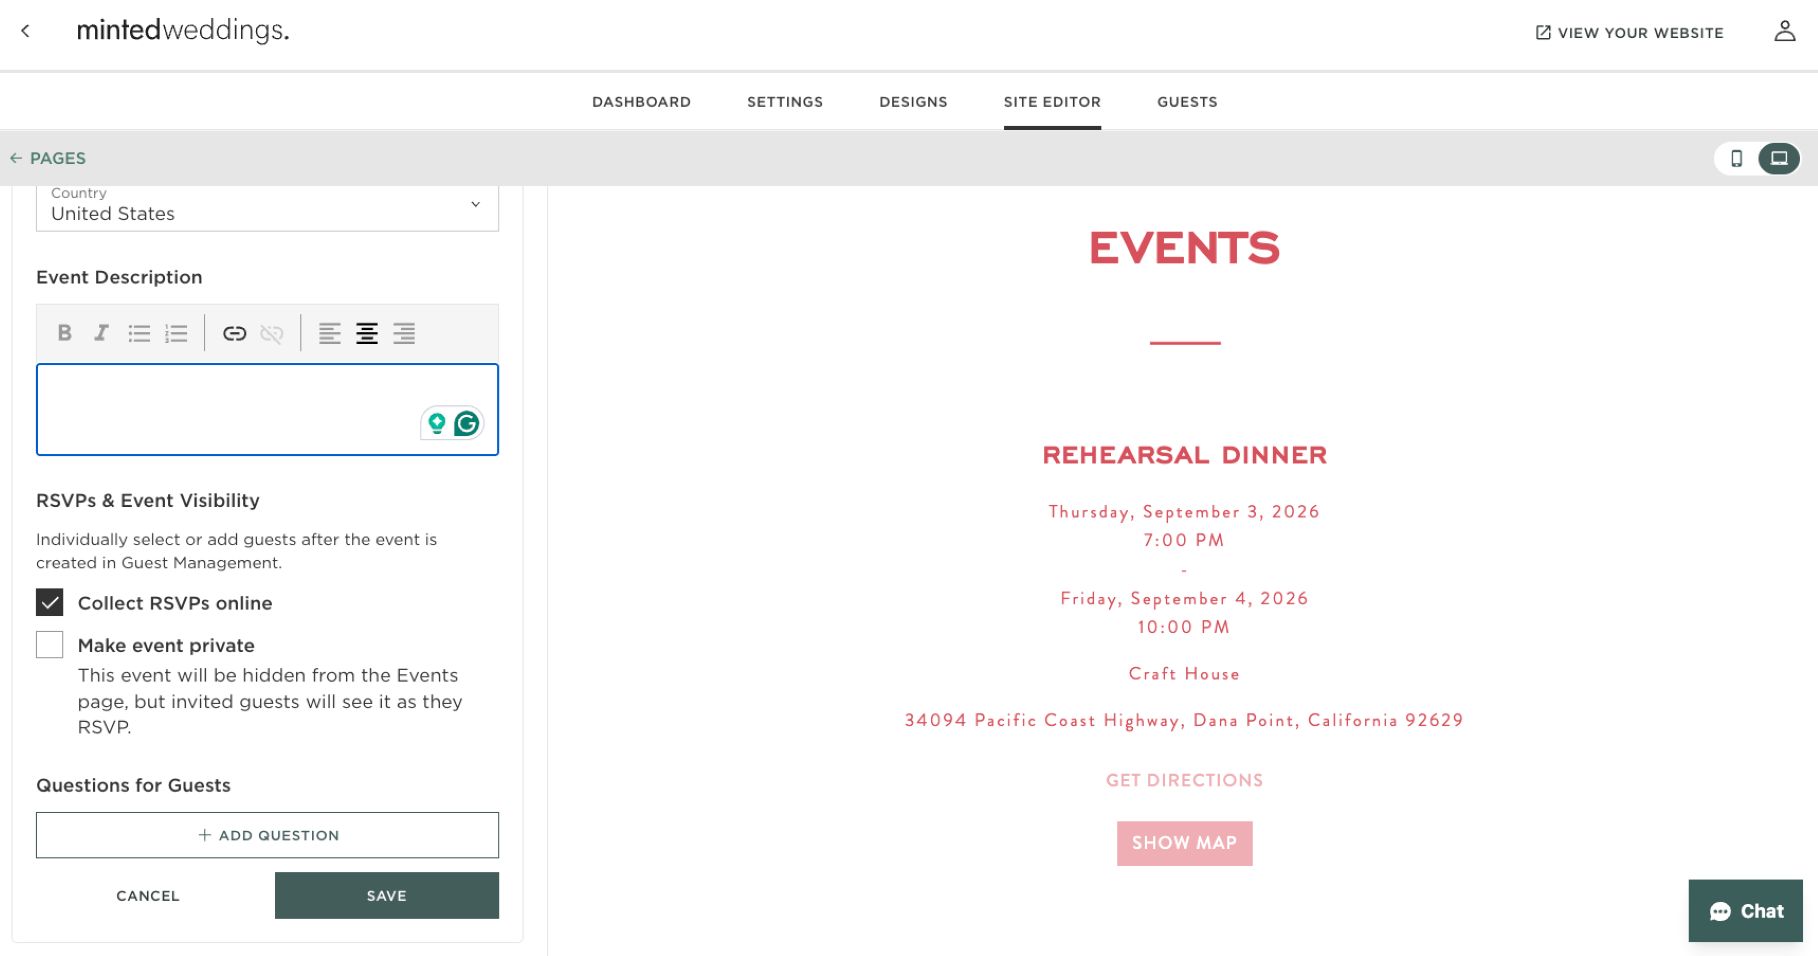
- If your event requires an RSVP, be sure to select the “Collect RSVPs online” checkbox. If you’d like the event details to only appear to those invited, select “Make event private.”
- Add questions for your guests to gather any specific information you may need for a particular event, such as if they will be bringing a plus one or if they have any food allergies/dietary restrictions that you need to be aware of.
- To add additional events, select the “Add to Events Page” button, then repeat this process for each event you plan to host throughout the course of your wedding weekend.
- You can also use the “Add to Events Page” button to add additional images, text, URLs, and more.
- To change the order of how events and other elements appear on the Events page, select “Reorder sections.” Then drag the event up or down the page editor menu to place it where you’d like it on the page.
Travel Information and Accommodations
Think about what you’d need to know in order to plan a trip, and provide this information to your guests so they don’t have to do all of the legwork. Examples include:
- Lodging options and special rates, including how to access your room blocks, if you have them
- Nearby transportation hubs (airports, train stations, etc.)
- Maps with directions
- Public transportation information (including car services like Uber and Lyft)
- Venue parking instructions
How to do it at Minted
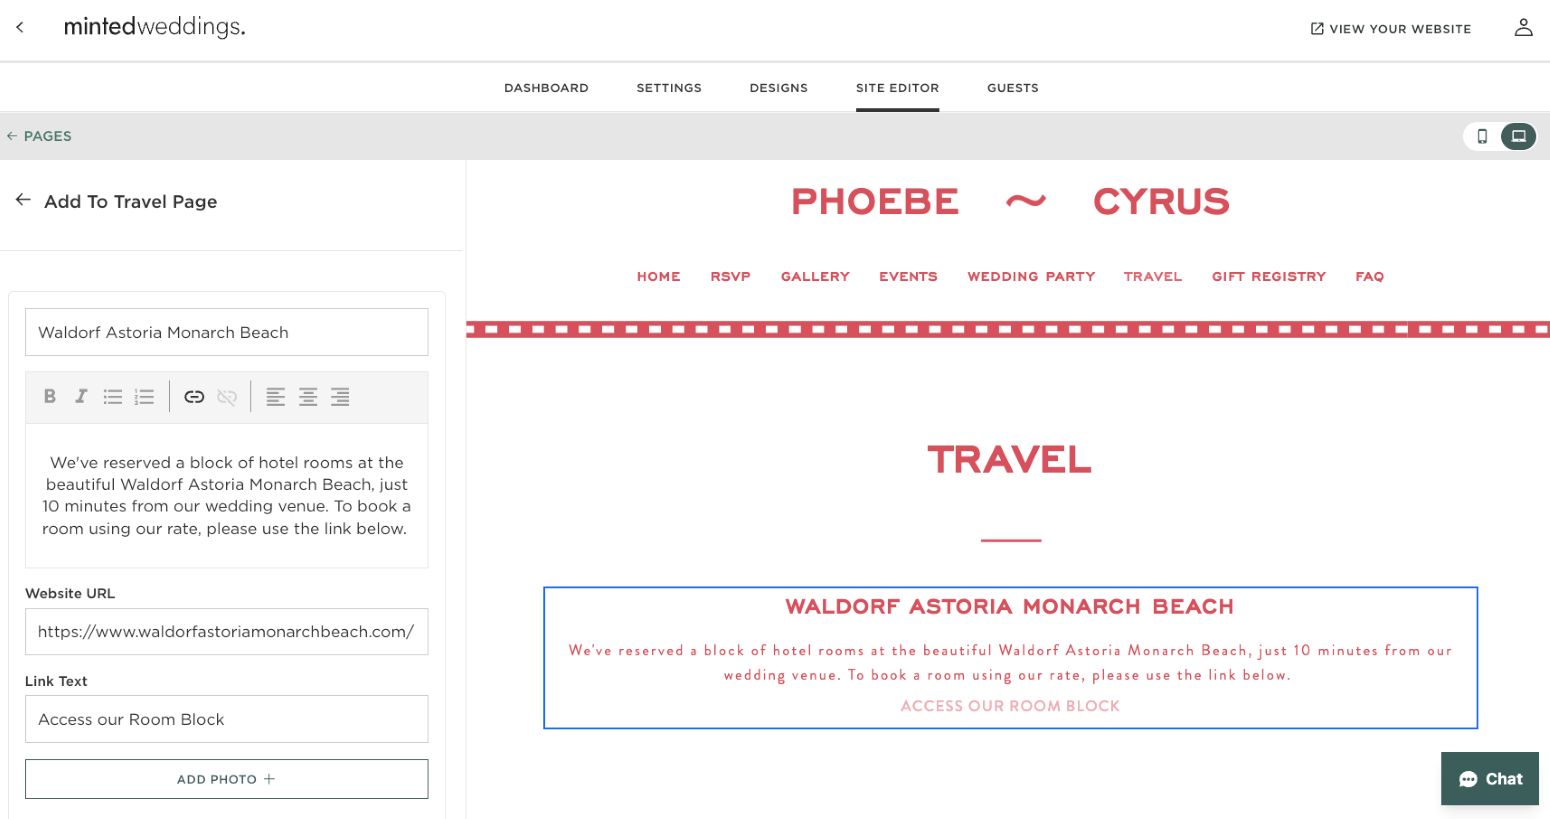
- From the “Pages” editor, select “Travel.”
- Select “Add Travel.”
- Enter the details of the accommodation, such as the hotel’s name and website.
- Add additional details, such as instructions for how to book a room within your room block. If you plan to add multiple accommodation options to your Travel page, it is a good idea to add a few details about each property (such as a photo, average room rates, how close they are to the venue, if you’ll have a shuttle coming to each location, etc.) to help your guests decide which one will be best for them.
- To add additional accommodations, select the “Add to Travel Page” button, then repeat this process.
- You can also use the “Add to Travel Page” button to add additional images, text, URLs, and more.
- To change the order of how accommodations and other elements appear on the Travel page, select “Reorder sections.” Then drag the event up or down the page editor menu to place it where you’d like it on the page.
FAQS
Weddings come with a lot of questions! Help make your life (and your guests’ lives) easier, by using your website to answer as many as you can. To get started on this page, think about all the questions you ask when you go to other people’s weddings, and try to include the answers. Common questions to include on an FAQ page include:
- Dress code and attire suggestions.
- Local weather or terrain conditions.
- Child attendance policy (consider listing local babysitting services if children are not invited).
- Whether you will be providing transportation to/from the ceremony and reception.
- "Unplugged" (cell phone/camera free) ceremony explanation, if applicable.
- Reminder of the RSVP deadline.
- Reminder of the ceremony start time and any timing notes (e.g., suggesting guests arrive 30 minutes ahead of time to enjoy a pre-ceremony cocktail). You could also include the reception end time, so guests have a sense of how late the party will go.
- Wedding hashtag.
- A note asking guests to reach out to you ahead of time if they have food allergies or dietary restrictions (if not added as an RSVP question).
- Contact information for any further questions (email address or phone number).
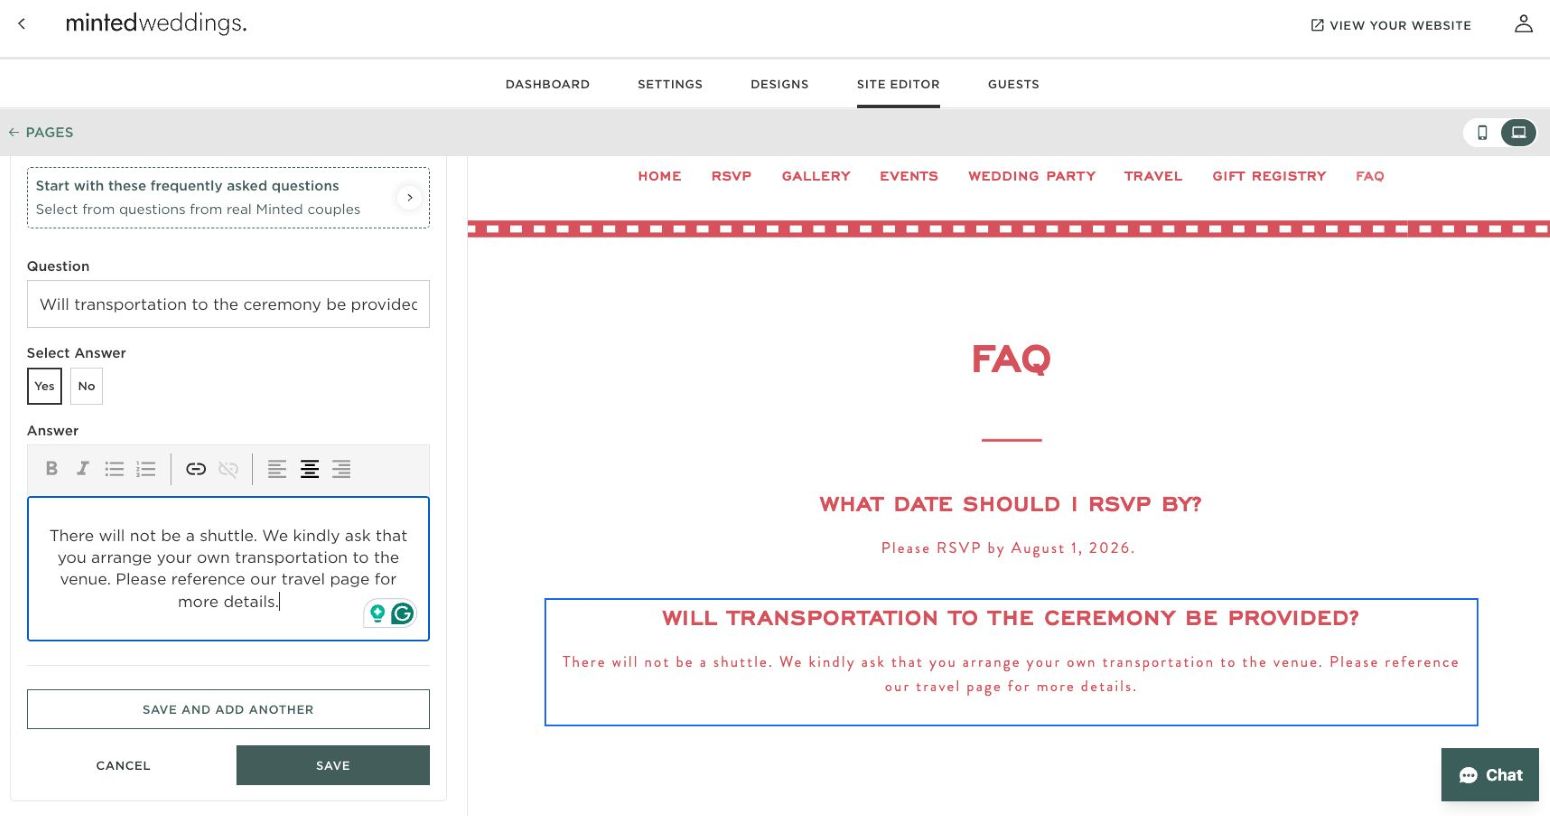
How to do it at Minted
- From the “Pages” editor, select “FAQ”
- To add questions and answers, select “Add FAQ.”
- Start with one of Minted’s suggested FAQs or use the “Question” field to add your own.
- If using one of Minted’s suggested FAQs, you can edit the provided answer text, or add your own.
- Once done, hit “Save and Add Another” to add another FAQ or hit “Save.”
- To change the order of how events and other elements appear on the FAQ page, select “Reorder sections.” Then drag the event up or down the page editor menu to place it where you’d like it on the page.
WEDDING PARTY
Many couples opt to include a section with a brief bio and/or photo of each wedding party member, describing their relationship to each person.
How to do it at Minted
- From the “Pages” editor, select “Wedding Party”.
- To add your first bridesmaid or groomsmen, select “Add Person”.
- Add their name and use the drop-down menu to designate their role in the wedding party. Our editor features 15 roles ranging from Made of Honor to Ring Bearer and even Honored Guest — you can also select “custom” to add your own role.
- To help guests get to know your wedding party ahead of the big day, we recommend using the text editor to add a little bit about how the couple knows each member, as well as uploading a photo of each person.
- Use the “Display Style” options to choose how you’d like your photos and text to be arranged.
- To add additional wedding party members, select the “Add to Wedding Party Page” button, then repeat this process.
- To change the order of how people and other elements appear on the Travel page, select “Reorder sections.” Then drag the event up or down the page editor menu to place it where you’d like it on the page.
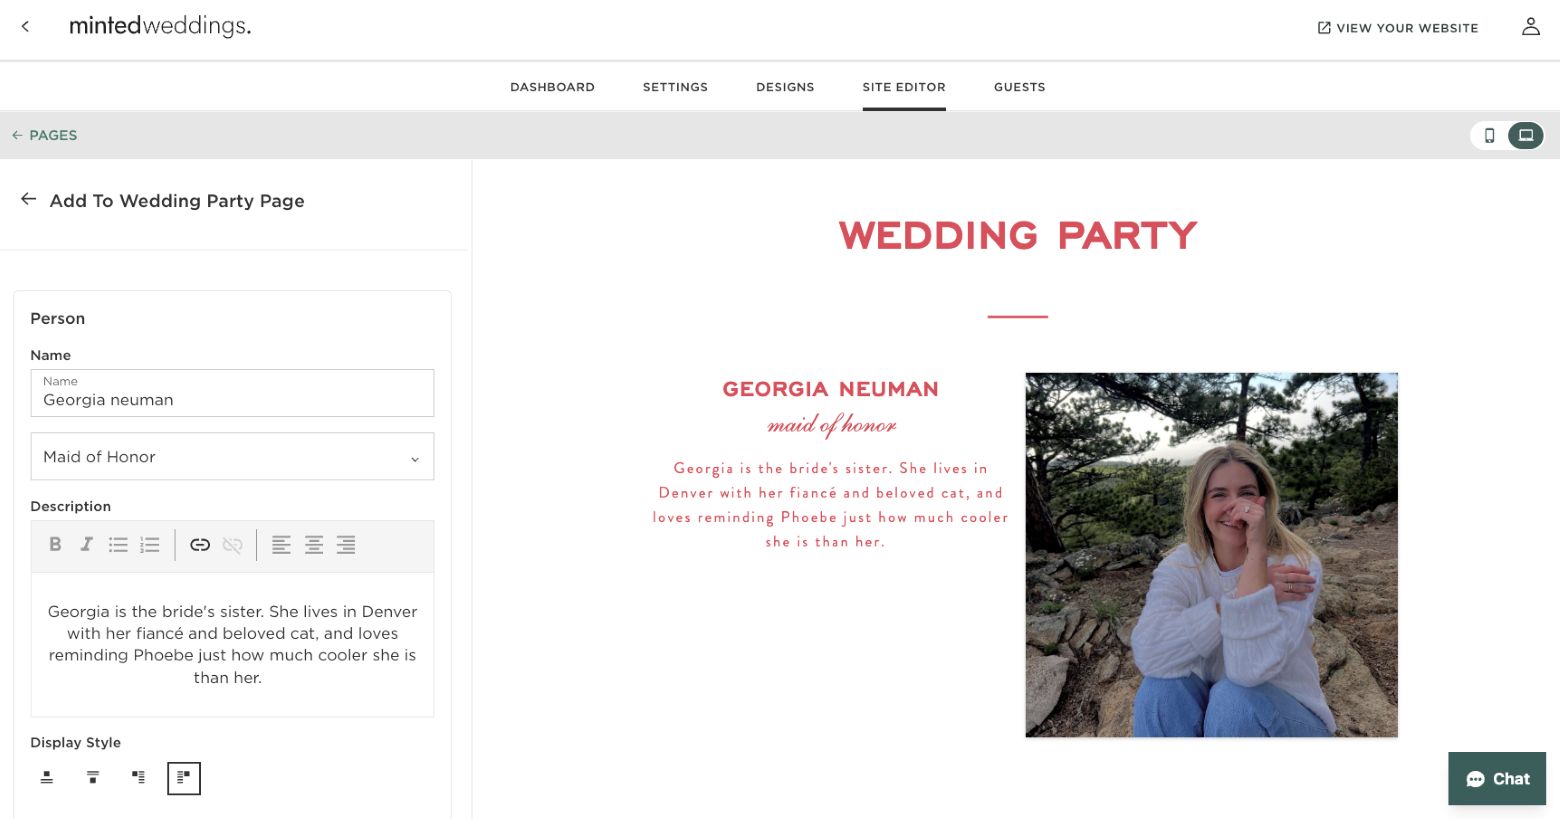
Photo and Video Gallery
If you had engagement photos taken, this is a great place to display them. Choose your favorite engagement session photos and a handful of cherished snapshots or short videos with your fiancé.
How to do it at Minted
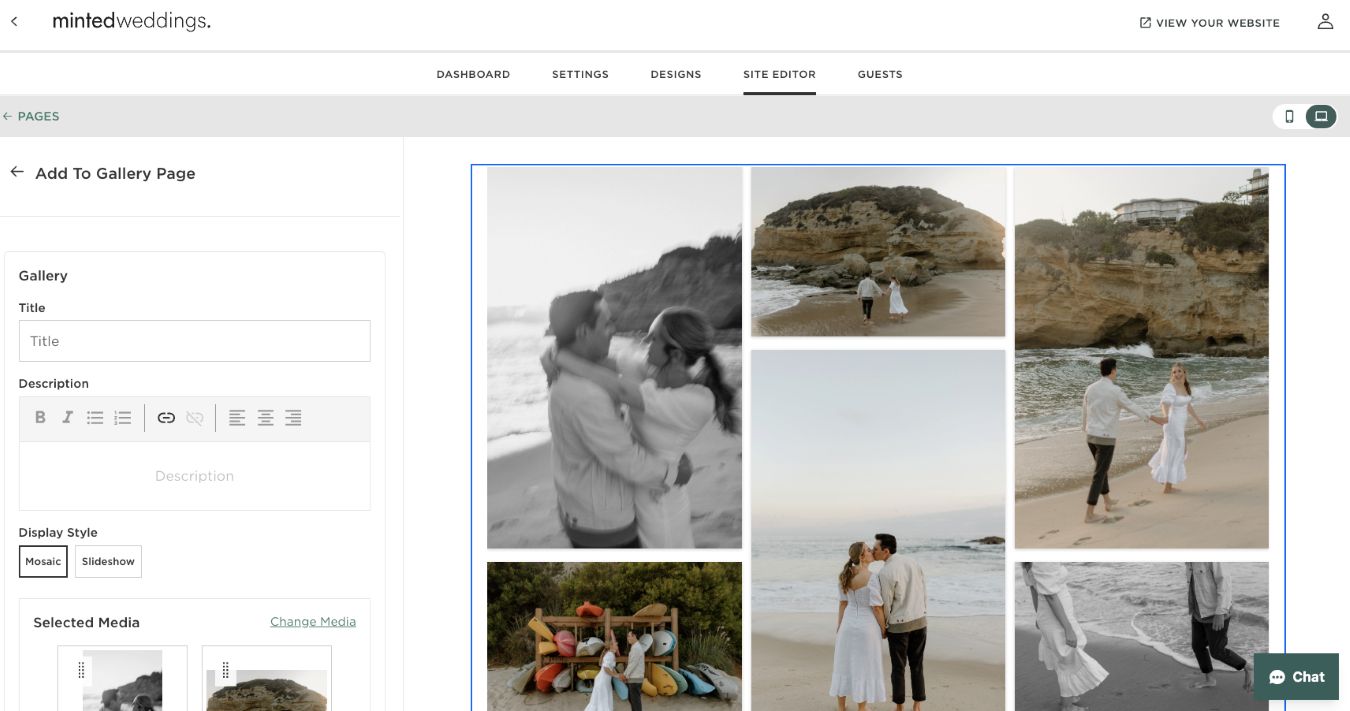
- From the “Pages” editor, select “Gallery.”
- To add a group of photos or videos, select “Add Gallery”
- If applicable, you can give each section a name by completing the “Section Title” field. This is a good idea to do if you plan to upload multiple groups of photos. For example, you might use one section to display a few engagement photos and another to display a handful of your favorite photos over the course of your relationship.
- If applicable, add a description to tell the story of the photos or video you’d like to display using the text editor field.
- Select “Add Media” to upload the photos you’d like to display into your media library. Then, click on the photos you’d like to include in your gallery before hitting “Select.”
- Choose from a mosaic or slideshow display.
- To change the order in which your photos appear within a particular section, click and hold the cluster of six dots in the left-hand corner of a particular image or video. Then drag it into position.
- To crop a photo or add a caption, select “Edit” underneath the image in the “Selected Media Panel.”
- Hit “Save” to add your gallery to the Gallery page.
Step 5: Add Guests and Set Up Online RSVPs
These days, many couples prefer online RSVPs instead of traditional mailed response cards. That said, we still recommend including a wedding website RSVP enclosure card with your invitation to direct guests to reply virtually by scanning a QR code.
Add Guests
To set up your website’s RSVP functionality, you’ll need to begin by adding your guests. Minted makes this super easy to do by allowing you to either upload a spreadsheet of your guest list, select from your online address book, or add them individually.
How to do it at Minted
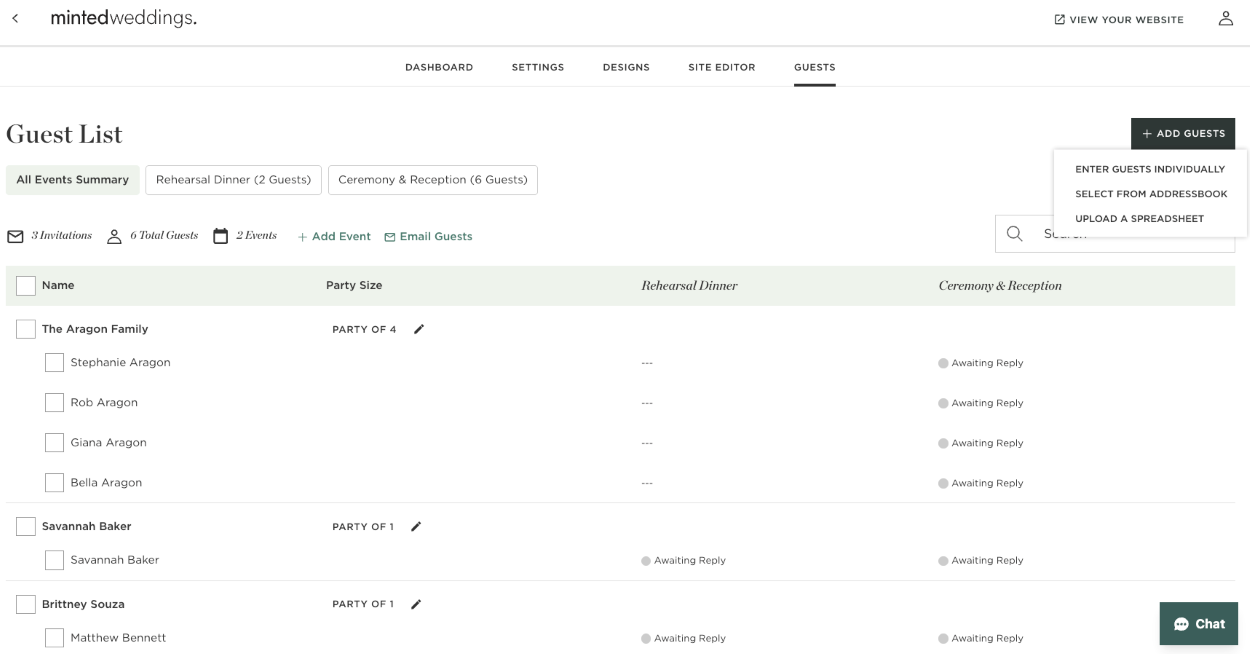
- From your dashboard, select “Guests” from the top navigation bar or “Add Guests” from the menu in the right-hand panel.
- Click “Add Guests” to begin building your guest list.
- If you’ve previously uploaded a guest list to Minted (if you used Minted’s free addressing when ordering your save the dates, for example), click “Select from Address Book” to add your guests already in our system to your list.
- If you haven’t previously created an address book, you can add guests individually or via uploading a spreadsheet (Minted has a template that you can utilize to make sure their information populates correctly in our system).
- Once you’ve added guests to your list, you can indicate their maximum party size. This tool is great if you are inviting families and want to keep track of how many people are in each group. This tool can also be used to designate who gets to bring a plus one — simply select a maximum party size of two for individuals who will be able to bring a date along with them, and a maximum party size of one for individuals who won’t be able to bring a date.
- Once a guest is on your list, you can select which events to invite them to by checking or unchecking the box next to each event name.
Enable RSVPs
Once your guest list has been uploaded to your wedding website, you can enable your site’s RSVP functionality.
How to do it at Minted
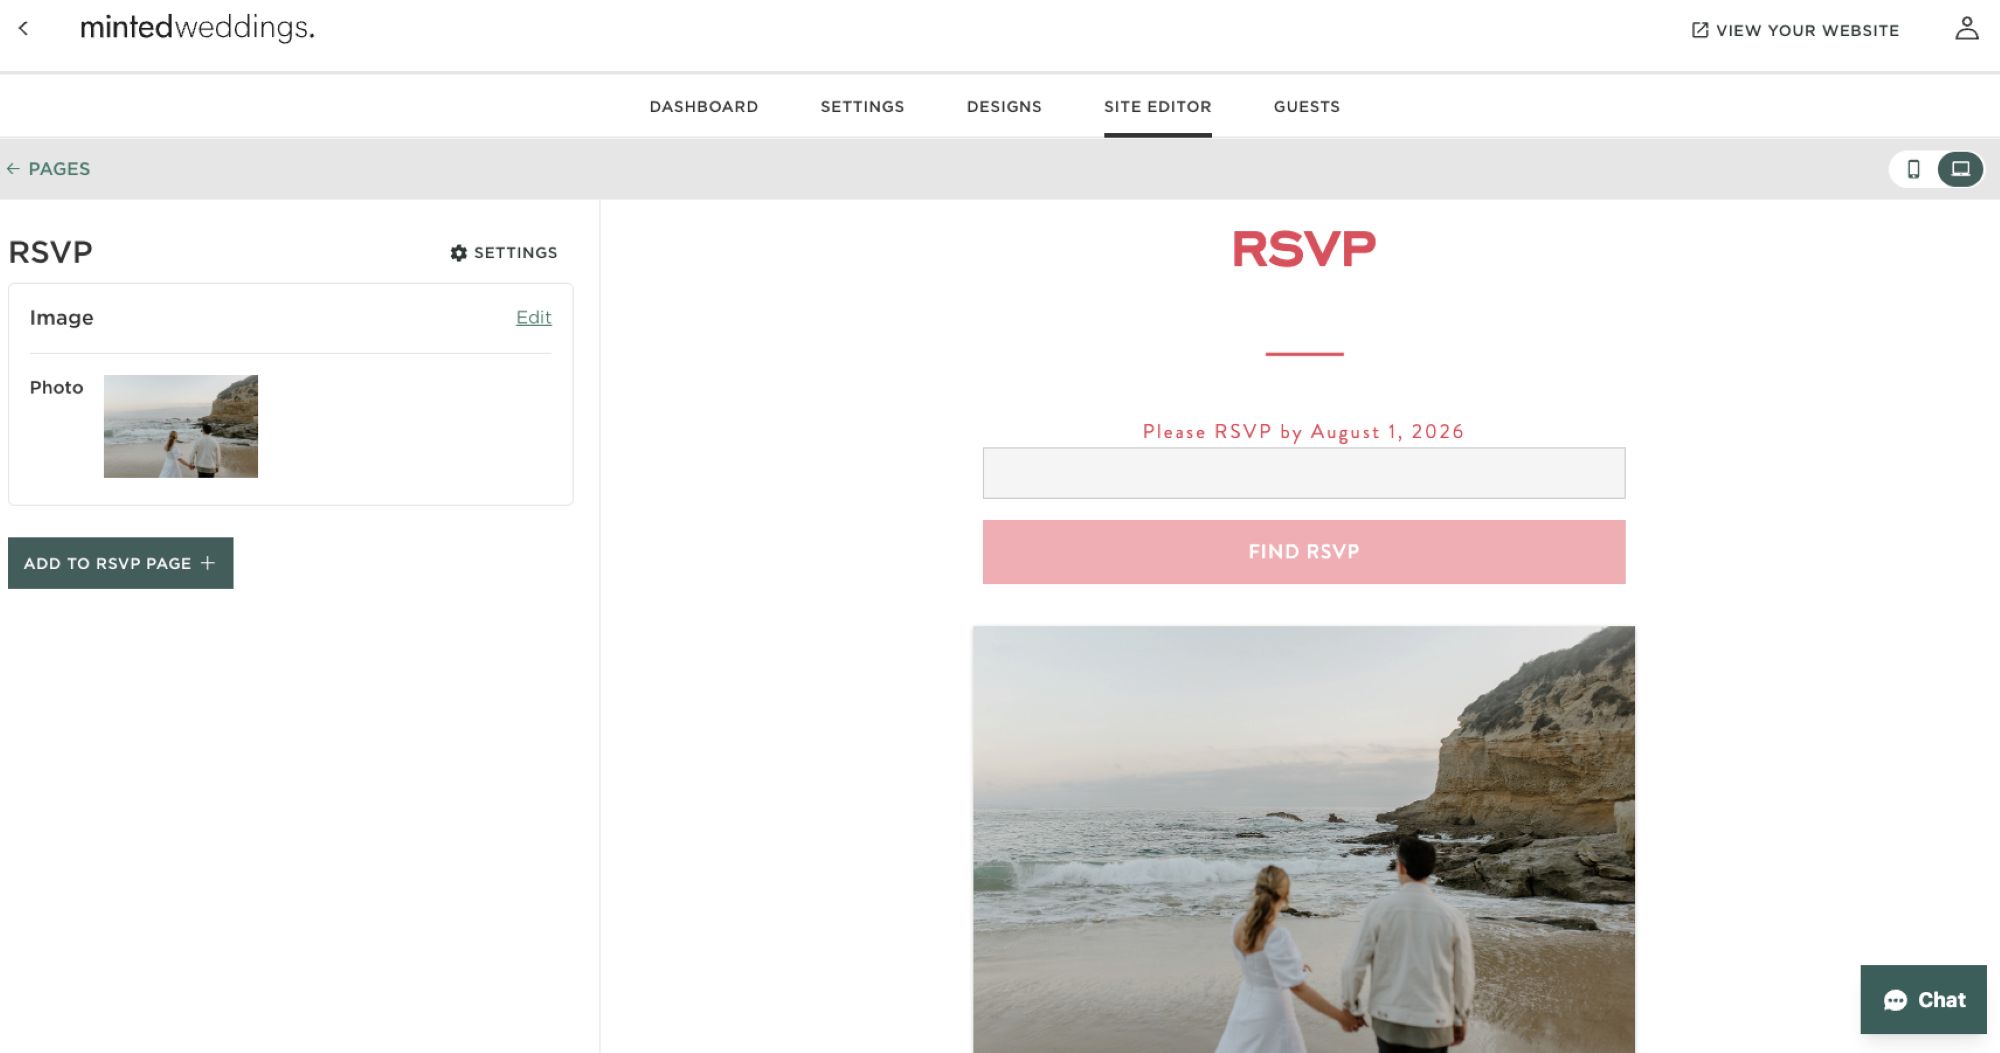
- Select “Site Editor” in the top navigation bar of the website dashboard.
- Select “RSVP” from the pages menu.
- An RSVP widget will automatically populate on the page. To add custom text to the RSVP widget, select “Settings.” From there you can add a sub-heading with a fun message or RSVP date reminder.
- If you’d like to customize the page with additional elements such as photos or extra text, select “Add Element” and then add your custom content blocks.
Step 6: Add Your Wedding Registry
Printing registry information on your actual invitation is usually not advised by etiquette experts, so your website is the perfect place to include these details. (Why? Mentioning a gift registry on the invite is like saying, "Please come to our wedding. Now, about those gifts we'd like you to buy us…")
Most wedding website services will allow you to add traditional gift registries by linking your registry accounts at each individual retailer to your wedding website. Some will also allow you to create cash registries, where guests can donate to a honeymoon fund or towards a down payment of a home.
How to it at Minted
- From the “Pages” editor, select “Gift Registry”.
- Select “Add Registry”.
- Use our drop-down menu to select the retailer your registry is hosted through, or add a custom registry.
- For each registry, you can add a short description and a link that goes directly to your registry at that retailer. You can also customize the button text and add an image, if you’d like.
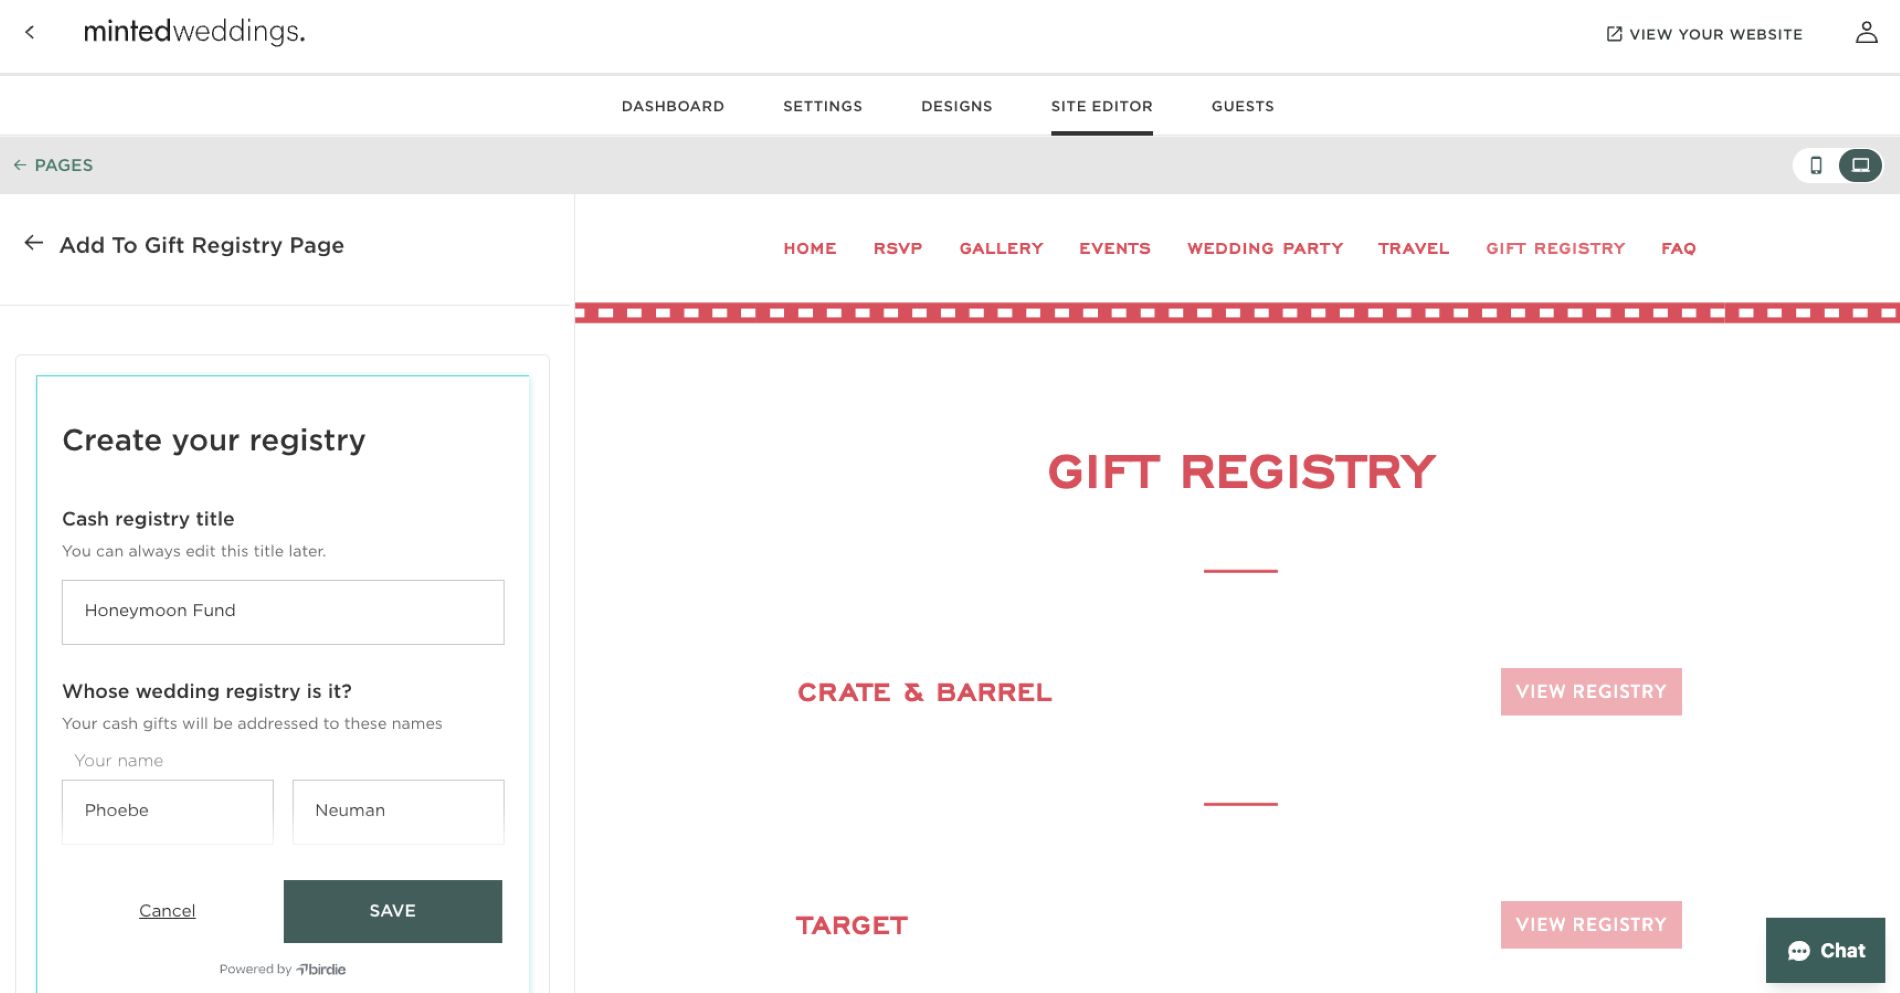
- To add a cash registry, select “Add to Registry Page” then “Add Registry” and “Add Cash Registry.”
- Name your cash registry by adding text to the “Registry Title” field. If you plan to have multiple cash registries, it is best to use the name to give guests an idea of what the money will be used for. Keep it simple with something like “Honeymoon Fund” or “Date Night.”
- Add your and your spouse-to-be’s names.
- Enter your event date.
- Add a message to your guests by writing your own or by selecting from one of our pre-written templates. Use this area to thank guests for their generosity, explain what you plan to use the cash for, or communicate that you would like to receive cash in lieu of physical gifts.
- Customize your cash registry URL to create a link that you’ll share with your guests.
- If you’d like your guests to see who else has contributed to the cash registry, you can toggle on “Show who has sent gifts.” If you do not want guests to see this information, be sure to toggle that functionality off.
- Add some personality to your registry by uploading a photo of the place you plan to honeymoon, your favorite date-night activity, or, if you’re donating the funds to charity, something that illustrates where the money will be going.
- Select “Save” once you’ve added all of the registry information.
Step 7: Create a URL
Before you share your registry, make it easy for your guests to find by creating a personalized URL. With Minted's wedding websites, you can add your names to the website address for free (i.e. "MarkandAnna.minted.us."); or, you can select a premium or a custom wedding website to create a custom URL like "couplename.com".
Pro tip: If you're opting for a custom URL, make sure the domain is available and fully yours before sending it out to wedding guests!
How to it at Minted
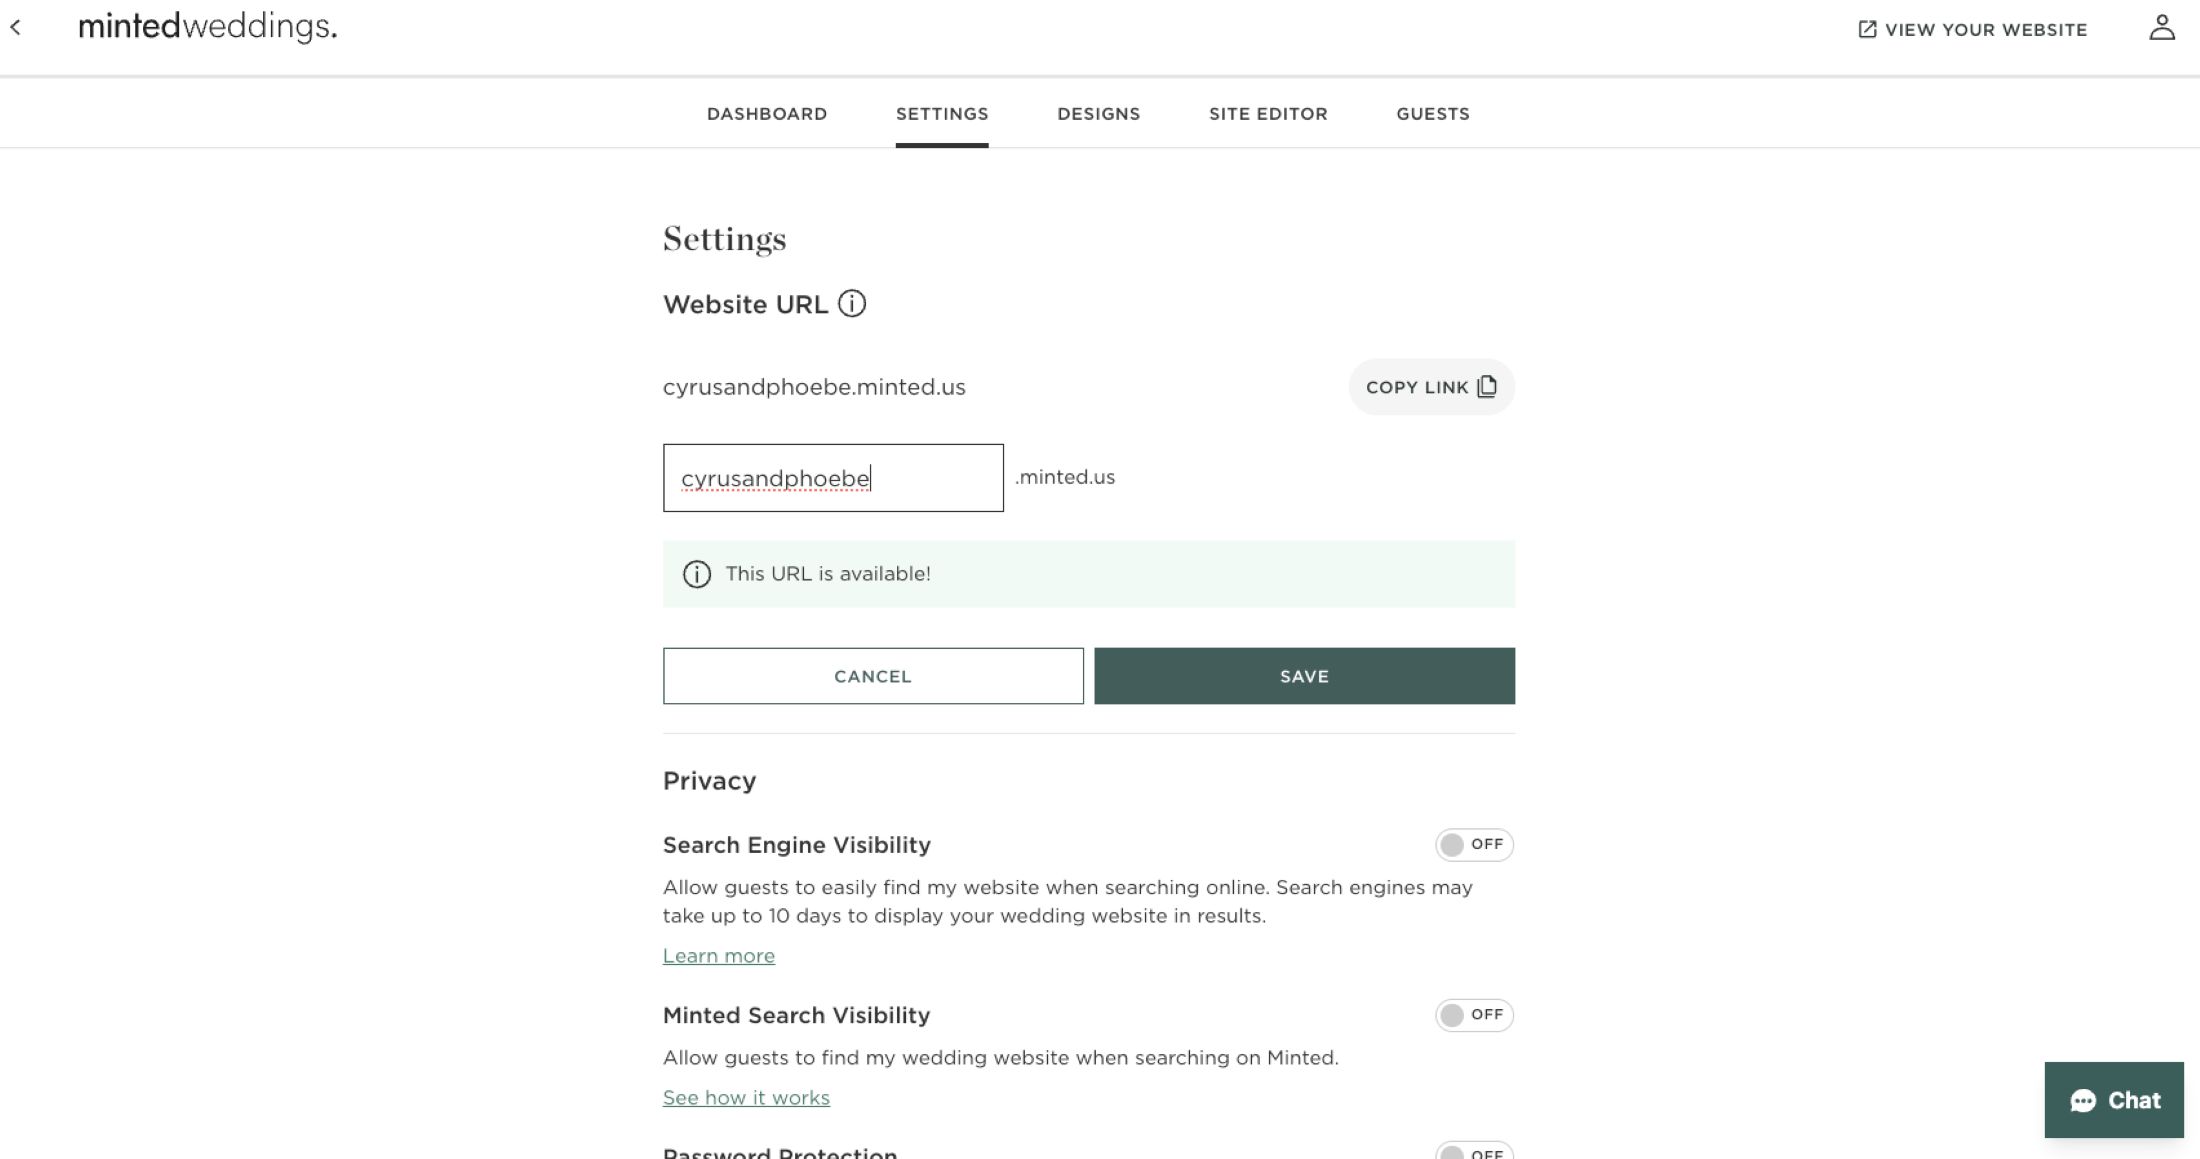
- Select “Settings” from the top navigation bar of the wedding website dashboard.
- Select “Edit” to edit your free minted URL, or click “Get a Custom URL” to set up a custom domain through our hosting partner.
- From this page, you can also toggle on password protection for your wedding website, designate which pages can be viewed without a password, and opt in to search engine and Minted search visibility.
Step 9: Keep Your Wedding Website Updated
The website is the easiest, most efficient way to share information with your guests. If details change, be sure to add them to the site and notify guests about the update via a quick email. Remember, the more up-to-date your wedding website is, the more helpful it will be to your guests… which ultimately means fewer questions for you to have to answer!
Wedding Website FAQs
When do you need to create your wedding website?
Ideally, you’ll have a simplified version of your wedding website complete before you send your save the dates, so you can include a URL on the card where guests can learn more information about the location and venue.
You can slowly begin to display more pages as you finalize wedding details such as hotel room blocks, your registry, and more. You’ll want to ensure you have a majority of the information you’d like guests to know published to your website by the time you send out your wedding invitations.
Can we start building the website before finalizing all our wedding details?
Absolutely! You can start by browsing design options and update your website with basic information like your names and date. You can also choose your color scheme and the photos you want to use as well. Once the other details are finalized just update them directly on the website builder.
How much information does your wedding website need to include?
At a bare minimum, your wedding website should include event information, RSVP information, and your registry. What you decide to add on top of that is totally up to you!
Here are a few additional details and personal touches your wedding website could include:
- Your love story
- Your wedding party
- A gallery with favorite photos of the two of you
- Wedding hashtag information
- Fun activities to do around your wedding venue
Should you password-protect your wedding website?
It is always a good idea to password protect your wedding website, especially if you plan to share specific event information with anyone who makes their way to your website. You can password protect your Minted wedding website by navigating to the “Settings” area of the Minted Weddings Website manager. From there, you can toggle on “Password Protection” and choose a password to set.
Note that if you decide to password protect your wedding website, you’ll want to be sure to include the password in all wedding communications, and especially on your save the dates and invitations.
What can we do with our website after our wedding is over?
You don’t need to get rid of your website after your big day! You can transform it into a digital memory book by sharing wedding photos, guest messages, behind-the-scenes moments, and highlight reels to make it even more special.
Beautiful Wedding Websites, Made Easy
Ultimately what you choose to include on your wedding website and how you choose to communicate that information to your guests is totally up to you. Like with all aspects of the wedding planning process, you can go simple or elaborate, casual or formal — just make sure to do your best to ensure your wedding website sets the tone, and provides all of the must-know details, for your big day!